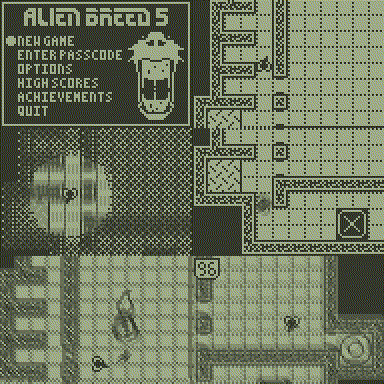
EDIT: Version 3.0.0 is now complete and available for download:

TI-84 Plus CE download
TI-83/TI-84 Plus download

Original post:

Since 3.5 years ago when I decided to do Alien Breed 5, I've had a rough plan in my head for it to be a 3-part game, ie. the first main release, followed by two additional campaigns with new features to be added later. I've recently started working on the 3rd and (most likely) final part. It's still very early days, but I've already gotten a few cool things done.

As usual, there will be a new campaign, although it will be different in structure to Episodes I & II. There will also be new gameplay elements, some new enemies, more achievements and potentially some slight graphics tweaks in the form of more tile animations.

So far, I've reworked the level file format to allow for some of the additional gameplay elements, which will allow for more things to happen in levels. The level editor pretty much had to be rebuilt from scratch, as well as making a simple program to convert the existing Episode I & II data to the new format. I'm now halfway through implementing the calculator-side changes to all of this, so that the game correctly interprets the new level format and starts incorporating the new elements.

Additionally, whilst this will still include the standard TI-83+/84+ flash application release, over the last 36 hours I've been doing some tests to see how viable it would be to include a build for the TI-84+CE!

I've drawn inspiration from MateoConLechuga's Mono2Color project for the TI-84+CSE, and after a few experiments determined that I'll most likely have to stick with monochrome tiles & sprites so that I can run the LCD in 1bpp mode, otherwise the frame rate gets way too slow. Below you can view a demonstration showing the game in 3 different zoom levels (x1, x2 & x3). As you'll see, x1 moves super quick, x2 moves roughly the same speed as the TI-83+/84+ monochrome version (within 1fps), and x3 is a bit slower again (around 7-8fps slower). Of course this demo only includes the scrolling background, no player/enemy/gunfire sprites. However, all the tile drawing & sprite rendering is done on a 768 byte buffer, the part that slows things down is scaling this 96x64 resolution buffer up to either 192x128 (x2) or 288x192 (x3). I'm confident that drawing the sprites over the tilemap will have minimal effect with the CPU speed of the TI-84+CE (but this will be my next few experiments).

The 768 video buffer -> vram drawing/scaling routines were written fairly quickly, so I might be able to optimise them a little. I'll continue playing around and see how I can improve it. At the very least, I'd like to have a TI-84+CE version with a play screen of 192x128.

This looks amazing. Very Happy Eager to see how it looks and functions when you get it into a more playable mode. Smile
Good work, as usual Smile
Thanks!

After sleeping on it, I came up with a different method this morning for copying & scaling the video buffer more efficiently. I only had a chance to test it on the 3x zoom (288x192 resolution) and it was running at pretty much the same frame rate as the 83+/84+ non CE version. I'll try it later on 2x zoom as well and see how fast it gets, but at a rough calculation it should be about 30% faster than the 83+/84+ non CE frame rate.

Either way, it's certainly workable Smile
Care to tell us a little bit about how this new copy-and-scale algorithm works? This is already very cool work, though, so congratulations! I can't wait to play it.
KermMartian wrote:
Care to tell us a little bit about how this new copy-and-scale algorithm works? This is already very cool work, though, so congratulations! I can't wait to play it.
Sure Smile Once I've gotten it to a point I'm happy with, the routine will be posted here for others to use if they like, but essentially it works as follows to scale a 96x64 video buffer up to 288x192 in vram:

1. There are 64 rows of data to scale and write, and each row has 12 bytes (1 bit per pixel).
2. Each row has to be scaled up to 36 bytes; it does this 1 source byte at a time, turning each source byte into 3 bytes (so %10011001 would become %111000000111111000000111). The current method does this using some "sla" and "rl" instructions in conjunction with the carry flag.
3. Once a row has been scaled, this scaled up row is then copied & pasted twice (using "ldir") to create the vertical scale.
4. Repeat for each row from step 2.

The 2x scale (96x64 up to 192x128) version runs the same, but in step 2 a source byte %10011001 only becomes 2 destination bytes %1100001111000011, and in step 3 the row is only copied & pasted once.
Today I've finished off (for the time being) the new level event scripting that will feature in Episode III: Impact (and Episodes I & II will be patched to the new format as well). The new format gives me more power to add multiple triggers & events during a level. In the below screenshot there are a few examples:

1. After a certain amount of time passes, an in-level text block is displayed, and the darkness filter is enabled.
2. When the player walks up to the computer, another text is displayed and the darkness filter is disabled.
3. Bosses are no longer triggered by a single tile - an area is set (can be any rectangular shape up to 32x32 tiles in size) that triggers a boss (technically there could be multiple bosses in a level now), and in this case also modifies two tiles in the level to seal off the room (previously this was locked to modify one tile when a boss fight started, and one more tile when a boss fight finished).
4. When the boss is killed, multiple tiles are modified to open various paths out of the room, the countdown sequence is triggered, and the level is flagged as being ready for completion.

Triggers & commands can be used in various combinations to create various events so that I can add more depth to the new levels.


Now that this is done, I'm going to attempt to start adapting the code and applying the new LCD routines to make it compatible with the TI-84+CE Smile
This is looking amazing as usual, James! 2/3x scaling both would be nice, it'd also give you a bit of room to add an HUD or something around it. If 3x scaling is still too slow, you could always have it move 2 'pixels' per frame or even 1.5 (1 pixel frame 1 then 2 pixels the next frame).
chickendude wrote:
This is looking amazing as usual, James! 2/3x scaling both would be nice, it'd also give you a bit of room to add an HUD or something around it. If 3x scaling is still too slow, you could always have it move 2 'pixels' per frame or even 1.5 (1 pixel frame 1 then 2 pixels the next frame).
Thanks chickendude! It will definitely be scaled up at least x2, but I'm hoping for x3. Either way, I will quite likely add a HUD in a similar style to the original game:

Nice work James. Smile Might I recommend that you operate in 8bpp mode rather than 1bpp mode for scaled images, as you should be able to get a decent speed increase because you only have to shift once, duplicate the byte, and then ldir the next lines? This is the process that the CE version of mono2color uses, and I've noticed it generally performs a lot better. Anyhow, fantastic work, and I can't wait to see where this goes! Smile
MateoConLechuga wrote:
Nice work James. Smile Might I recommend that you operate in 8bpp mode rather than 1bpp mode for scaled images, as you should be able to get a decent speed increase because you only have to shift once, duplicate the byte, and then ldir the next lines? This is the process that the CE version of mono2color uses, and I've noticed it generally performs a lot better. Anyhow, fantastic work, and I can't wait to see where this goes! Smile
Thanks Mateo! I'll give that a try. It does mean that I'll have to write 8 times the amount of data to Vram, but the trade off might be worth it for less bit shifting.

EDIT: Well I must admit, I was pleasantly surprised, thanks for the advice, Mateo! I adjusted the routine to work in the fashion you suggested, and it's about 20% faster again! Of course, another added benefit of this is that I can use other colours around the border and for the HUD. I guess maybe I could try using 2bpp on the scrolling background buffer as well. It might slow down the scrolling too much, but it's worth a try! Anyways, first I'll try to get the game at least running properly on the TI-84+CE at least in monochrome, and then I'll see how far I can push it.. Wink

I've put my previous revision below, followed by the latest (faster) revision.

Running in 1bpp mode:

Code:
;------------------------------------------------
; vbufCopyX3 - copy 1bpp vbuf (96*64) to vram, scaling up to 288*192
;   input:  none
;   output: none
;------------------------------------------------
vbufCopyX3:
        ld      ix,vbuf                         ; IX => 768 byte 1bpp buffer (96x64/8)
        ld      hl,vram+(24*40)+2               ; HL => where to start writing 288x192 scaled up image on vram
        ld      c,64
vbcx3Row:
        ld      b,12
vbcx3Col:
        ; expand 12 bytes of row data into 36 bytes by expanding each byte A into three bytes CDE
        push    bc
        ld      bc,8*256+0                      ; B = bit counter, C = upper byte of expanded byte
        ld      de,0                            ; DE = high byte of extended byte, E = low byte of extended byte
        ld      a,(ix)
vbcx3Pixel:
        sla     a
        push    af                              ; save carry flag
        rl e \ rl d \ rl c
        pop af \ push af
        rl e \ rl d \ rl c
        pop     af
        rl e \ rl d \ rl c
        djnz    vbcx3Pixel                      ; repeat for each pixel to build the 3 byte CDE from the 1 byte (ix)
        ld (hl),c \ inc hl
        ld (hl),d \ inc hl
        ld (hl),e \ inc hl
        pop     bc
        inc     ix                              ; IX => next source byte
        djnz    vbcx3Col
        ; copy and paste that destination row twice more to scale on y axis
        push    bc
        ld      bc,4
        add     hl,bc
        push hl \ pop de                        ; DE => next row of vram
        ld      bc,-40
        add     hl,bc                           ; HL => row of vram we just drew
        ld      bc,36
        push    bc
        ldir                                    ; first copy
        inc hl \ inc hl \ inc hl \ inc hl       ; HL => 2nd generated row
        inc de \ inc de \ inc de \ inc de       ; DE => 3rd row
        pop     bc
        ldir                                    ; second copy
        inc de \ inc de \ inc de \ inc de
        ex      de,hl                           ; HL => where to start writing next row to vram
        pop     bc
        dec     c
        jp      nz,vbcx3Row
        ret


Running in 8bpp mode:

Code:
;------------------------------------------------
; vbufCopyX3 - copy 1bpp vbuf (96*64) to vram, scaling up to 288*192
;   input:  none
;   output: none
;------------------------------------------------
vbufCopyX3:
        ld      ix,vbuf                         ; IX => 768 byte 1bpp buffer (96x64/8)
        ld      hl,vram+(24*320)+16             ; HL => where to start writing 288x192 scaled up image on vram
        ld      c,64
vbcx3Row:
        ld      b,12
vbcx3Col:
        ; expand 12 bytes of row data into 36 bytes by expanding each byte A into three bytes CDE
        push    bc
        ld      b,8                             ; B = bit counter
        ld      a,(ix)
vbcx3Pixel:
        ld      c,0
        sla     a
        jr      nc,vbcx3Write
        inc     c
vbcx3Write:
        ld (hl),c \ inc hl
        ld (hl),c \ inc hl
        ld (hl),c \ inc hl
        djnz    vbcx3Pixel
        pop     bc
        inc     ix                              ; IX => next source byte
        djnz    vbcx3Col
        ; copy and paste that destination row twice more to scale on y axis
        push    bc
        ld      bc,32
        add     hl,bc
        push hl \ pop de                        ; DE => next row of vram
        ld      bc,-320
        add     hl,bc                           ; HL => row of vram we just drew
        ld      bc,288
        push    bc
        ldir                                    ; first copy
        ld      bc,32
        add     hl,bc                           ; HL => 2nd generated row
        ex      de,hl
        add     hl,bc
        ex      de,hl                           ; DE => 3rd row
        pop     bc
        ldir                                    ; second copy
        ex      de,hl
        ld      bc,32
        add     hl,bc                           ; HL => where to start writing next row to vram
        pop     bc
        dec     c
        jp      nz,vbcx3Row
        ret
Here's a version that does double rather than triple; hopefully some inspiration can also come from it. Should help by unrolling the loops to get some more speed Smile


Code:
;------------------------------------------------------------------
; CE_UpdateScreen
; Replaces iFastcopy and others
; inputs: ix->data to output to screen
;------------------------------------------------------------------
CE_UpdateScreen:
 ld hl,vRAM+64+(56*320)

 ld b,64
_loop:
 push bc
  ld b,12
_double:
  push hl
_line:
   ld e,(ix)
   inc ix
   
   xor a
   sla e
   adc a,a
   ld (hl),a
   inc hl
   ld (hl),a
   inc hl
   xor a
   sla e
   adc a,a
   ld (hl),a
   inc hl
   ld (hl),a
   inc hl
   xor a
   sla e
   adc a,a
   ld (hl),a
   inc hl
   ld (hl),a
   inc hl
   xor a
   sla e
   adc a,a
   ld (hl),a
   inc hl
   ld (hl),a
   inc hl
   xor a
   sla e
   adc a,a
   ld (hl),a
   inc hl
   ld (hl),a
   inc hl
   xor a
   sla e
   adc a,a
   ld (hl),a
   inc hl
   ld (hl),a
   inc hl
   xor a
   sla e
   adc a,a
   ld (hl),a
   inc hl
   ld (hl),a
   inc hl
   xor a
   sla e
   adc a,a
   ld (hl),a
   inc hl
   ld (hl),a
   inc hl
   
   djnz _line
   ld de,128
   add hl,de
   ex de,hl
  pop hl
  ld bc,12*8*2
  ldir
  ld hl,128
  add hl,de
 pop bc
 djnz _loop
 ret
Excellent, thanks again! Using the "adc" and avoiding some "djnz" should certainly grant even more speed bonus! Smile

EDIT: It's really picking up speed now after using some ideas from your routine, combined with a little more optimisation on part of my code. Here's the latest routine:
Code:
;------------------------------------------------
; vbufCopyX3 - copy 1bpp vbuf (96*64) to vram, scaling up to 288*192
;   input:  none
;   output: none
;------------------------------------------------
vbufCopyX3:
        ld      ix,vbuf                         ; IX => 768 byte 1bpp buffer (96x64/8)
        ld      hl,vram+(24*320)+16             ; HL => where to start writing 288x192 scaled up image on vram
        ld      c,64
vbcx3Row:
        ld      b,12
        push    hl                              ; save ptr to start of expanded line on vram
vbcx3Col:
        ; expand 12 bytes of row data into 36 bytes
        ld      d,(ix)                          ; D = byte to expand
        ; bit 7
        xor a \ sla d \ adc a,a
        ld (hl),a \ inc hl \ ld (hl),a \ inc hl \ ld (hl),a \ inc hl
        ; bit 6
        xor a \ sla d \ adc a,a
        ld (hl),a \ inc hl \ ld (hl),a \ inc hl \ ld (hl),a \ inc hl
        ; bit 5
        xor a \ sla d \ adc a,a
        ld (hl),a \ inc hl \ ld (hl),a \ inc hl \ ld (hl),a \ inc hl
        ; bit 4
        xor a \ sla d \ adc a,a
        ld (hl),a \ inc hl \ ld (hl),a \ inc hl \ ld (hl),a \ inc hl
        ; bit 3
        xor a \ sla d \ adc a,a
        ld (hl),a \ inc hl \ ld (hl),a \ inc hl \ ld (hl),a \ inc hl
        ; bit 2
        xor a \ sla d \ adc a,a
        ld (hl),a \ inc hl \ ld (hl),a \ inc hl \ ld (hl),a \ inc hl
        ; bit 1
        xor a \ sla d \ adc a,a
        ld (hl),a \ inc hl \ ld (hl),a \ inc hl \ ld (hl),a \ inc hl
        ; bit 0
        xor a \ sla d \ adc a,a
        ld (hl),a \ inc hl \ ld (hl),a \ inc hl \ ld (hl),a \ inc hl
        inc     ix                              ; IX => next source byte
        djnz    vbcx3Col
        ; copy and paste that destination row twice more to scale on y axis
        ld      de,32
        add     hl,de
        ex      de,hl                           ; DE => next row of vram
        pop     hl                              ; HL => row of vram we just drew
        push    bc
        push    de
        ld      bc,288
        push    bc
        ldir
        ld      hl,32
        add     hl,de
        ex      de,hl                           ; DE => 3rd row to write
        pop     bc
        pop     hl                              ; HL => 2nd row we just wrote
        ldir
        ld      hl,32
        add     hl,de                           ; HL => start of next row of vram
        pop     bc
        dec     c
        jp      nz,vbcx3Row
        ret


Here's an updated video showing the optimised routine in action, as well as now having a solid black border around the rendered tile map (seeing as vram is still in 8bpp mode)
I'm not sure how it is on the ez80, but on the z80 it's faster to directly load a register with an immediate value than it is to push/pop it, i have a feeling it's the same on the ez80 as well, you could just directly load 288 into bc again. Not that it'd make that much of a difference, though.
chickendude wrote:
I'm not sure how it is on the ez80, but on the z80 it's faster to directly load a register with an immediate value than it is to push/pop it, i have a feeling it's the same on the ez80 as well, you could just directly load 288 into bc again. Not that it'd make that much of a difference, though.
I would bet that you're probably correct Smile

I haven't done much work on this for the past week as I've been enjoying a summer week off work, but current status is that after many hours of work, the source now cross-compiles for both the 83+/84+ app version and the 84+CE program version. Now I just need to start stepping through the 84+CE version and get the game to a playable state.
JamesV wrote:
chickendude wrote:
I'm not sure how it is on the ez80, but on the z80 it's faster to directly load a register with an immediate value than it is to push/pop it, i have a feeling it's the same on the ez80 as well, you could just directly load 288 into bc again. Not that it'd make that much of a difference, though.
I would bet that you're probably correct Smile

I haven't done much work on this for the past week as I've been enjoying a summer week off work, but current status is that after many hours of work, the source now cross-compiles for both the 83+/84+ app version and the 84+CE program version. Now I just need to start stepping through the 84+CE version and get the game to a playable state.


Keep going, JamesV! It looks good so far, and keep up the awesome work!
caleb1997 wrote:
Keep going, JamesV! It looks good so far, and keep up the awesome work!
Thanks! Smile

I'm getting close to getting the game somewhat playable on the 84+CE, there are just a lot of little Z80 -> eZ80 things to patch up (eg. "ld h,0 \ ld l,a" needing to be updated to "ld hl,0 \ ld l,a" etc.)

In terms of the new campaign, Episode III: Impact, it will be a little different to Episodes I & II. Instead of just being a linear 12 level campaign, it will have multiple routes available. The current plan is to have around 30 levels, with a single play through taking you through anywhere between 11-14 levels depending on the path you take (around 5-6 different paths available). The paths that take less levels will have a slightly higher difficulty curve than the paths that take more levels. This one won't be set on a space station either, it will be on a planet surface & multiple towers, ala Alien Breed: Tower Assault.

I've also got at least one more enemy getting added in (the "security guard" enemy from the previous Alien Breed IV game of the early 2000's that I did), and I have ideas for another 2 possible enemies that I haven't implemented before that I think would be cool Smile
The game now runs and the player can move around a level. Enemies / shooting, etc. are still disabled, but should be working in the next week or two. I haven't had a whole lot of spare time to work on this lately, but I'm enjoying chipping away at it bit by bit Smile

Text & menus aren't properly implemented yet, but I'll (most likely) be overhauling them on the TI-84+CE version to have higher definition splash screens and font.

Whoa! Those are some really slick pixels! I'm liking the custom "7-segment" countdown font! Very Happy
JamesV wrote:
I'm getting close to getting the game somewhat playable on the 84+CE, there are just a lot of little Z80 -> eZ80 things to patch up (eg. "ld h,0 \ ld l,a" needing to be updated to "ld hl,0 \ ld l,a" etc.)


Code:
or a,a
sbc hl,hl
ld l,a

Is shorter Smile Anywho, fantastic work! This is looking pretty sweet indeed; can't wait for another awesome cross compatible game. Good luck, and keep it up!
  
Register to Join the Conversation
Have your own thoughts to add to this or any other topic? Want to ask a question, offer a suggestion, share your own programs and projects, upload a file to the file archives, get help with calculator and computer programming, or simply chat with like-minded coders and tech and calculator enthusiasts via the site-wide AJAX SAX widget? Registration for a free Cemetech account only takes a minute.

» Go to Registration page
» Goto page 1, 2, 3, 4, 5, 6, 7  Next
» View previous topic :: View next topic  
Page 1 of 7
» All times are UTC - 5 Hours
 
You cannot post new topics in this forum
You cannot reply to topics in this forum
You cannot edit your posts in this forum
You cannot delete your posts in this forum
You cannot vote in polls in this forum


Advertisement